A guide and explanation for making Firefox more secure/private using arkenfox user.js and some essential addons. This is a compilation from
various sources that are linked at the bottom of this article, and from my useless and extensive attempt for having a useful yet ‘privacy-oriented’
and ‘secure browser’, things that are mutually exclusive. Still, this guide will leave the user with a better than nothing tool to navigate the net.
A little test before
You should check your browser against fingerprinting just so you can compare after. For that use this website: deviceinfo.me. This is all the data that first-party and third-party sites get from you, but we will minimize it. Keep in mind that some information won’t be concealed, such as your IP or location. Please do the test again after you finish.
arkenfox user.js
This tool is just a user config template that interacts with the inner functions of Firefox. It is highly recommended that you read the wiki so you can customize it. Otherwise, with just downloading the file and making the browser use it would be more than enough in most cases. So for that:
firefox -no-remote -CreateProfile <userprofile>
That will create a user directory under $HOME/.mozilla/firefox/ that contains the string <userprofile> at the end of it.
Now delete its content, download arkenfox user.js and activate the profile:
cd $HOME/.mozilla/firefox/<userprofile>/ && rm times.json
wget https://raw.githubusercontent.com/arkenfox/user.js/master/user.js
firefox -P <userprofile>
Note: firefox -P <userprofile> where <userprofile> is just the string you used to create the profile (not the random numbers from the directory)
Check /usr/lib/firefox/ for these plugins (some may not be included) and delete them:
- firefox@getpocket.com.xpi
- followonsearch@mozilla.com.xpi
- activity-stream@mozilla.org.xpi
- screenshots@mozilla.org.xpi
- onboarding@mozilla.org.xpi
- formautofill@mozilla.org.xpi
- webcompat@mozilla.org.xpi
Those are the basics, as I said read the extense wiki for customizing the template.
Note: notice that the content of the explorer have borders. That is a letterboxing option that strengthens against fingerprinting.
If it bothers you, edit your user.js and search for user_pref("privacy.resistFingerprinting.letterboxing", true);. Then replace
true with false.
Now start firefox we are going to install some addons.
uMatrix
The superior blocker. If configured properly, it will restrict any malicious site you may misstakenly enter to and block any pop up window or annoying ad, guaranteed. Other extensions or even the built-in anti ad options of for example, Brave Browser, are useless and do not work properly.
This extension gives you a per site list that shows first and third party domains that you are establishing a connection to. If you click on the extension icon and look at the grid,
you will notice 8 elements. These are simply the reason why this addon is superior to others. It will block ANYTHING because it doesn’t block per domain. In other words and as an example,
if you deny script, it will block JavaScript in every site you visit. Inferior extensions have a gigantic database of domains to work with, so if a domain is missing it is impossible for
it to block its elements.
First, go to uMatrix’s configuration panel and open the Settings tab. Copy this:
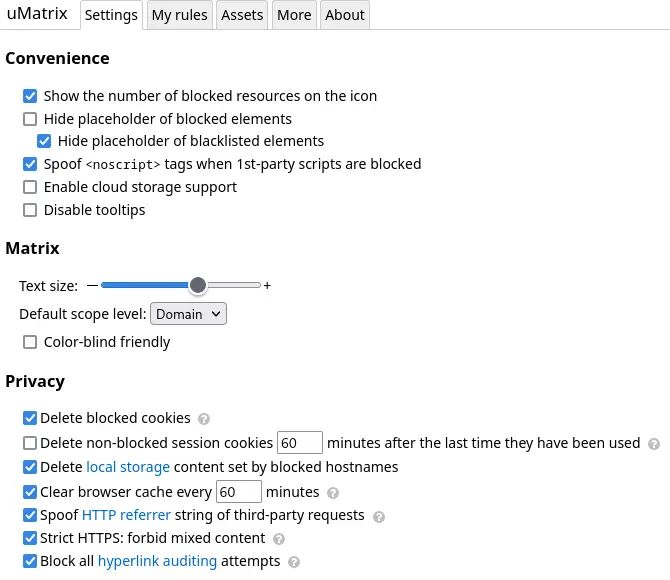
I recommend you use Domain as an option to Default scope level so you can create more flexible rules such as the one from the example that comes later in the guide.
Cookies are trapped locally by uMatrix. This allows you to inspect the contents of it and blocks the sender from getting it back. Turn on the option and set
a timer for deleting non-blocked cookies if you want.
Moving on, lets generate some rules. Go to uMatrix’s panel and then to My Rules. Observing, you can see two sections: left is for permanent rules and right is for temporary rules. For editing a rule in,
type in the right section, then save it and click commit. Rules consist of 4 parts (* is a wildcard, which means any):
* * * allow/deny
| | |
| | |______ Element
| |________ Domain
|__________ Scope
So for a start, consider adding these strong rules:
* * * block
* * css allow
* * image allow
The first line blocks ANYTHING on any scope and domain. Then the second and third overrides first and allows css and image on ANY scope and domain. Pretty easy. This is a good start for then tweaking and adding more rules.
Say you want to log in to a site you frequent. This site will need cookies allowed, and maybe needs a script to run a captcha from a third-party domain like google. Such rule would look like this:
* ineedcookies.com cookie allow
ineedcookies.com googlecaptcha.com script allow
This will allow the google’s domain only in the site requesting for a login, which is desirable. This is pretty much it, if you are not looking for a strong blocking ruleset, you can use uBlock Origin which is from the same creator, or search the wiki for a more suitable example.
Decentraleyes
This one is a content blocker that will deny, in the majority of cases, third party domains from trying to deliver something you don’t need. You could say, ‘but isn’t that already done by uMatrix?’, and you are honestly right. The thing is that uMatrix breaks everything it touches. While adding Decentraleyes on top of it, you could still mantain some aspects of the sites you are visiting. Decentraleyes stores content locally so you can still make use of it without the sender getting a response. On the other hand, uMatrix will prevent Decentraleyes from doing so if it is hardblocking content. To avoid that from happening, you need to create some extra rules in uMatrix that allow traffic to some convenient domains.
These are the rules:
* ajax.aspnetcdn.com * allow
* ajax.googleapis.com * allow
* ajax.microsoft.com * allow
* cdn.jsdelivr.net * allow
* cdnjs.cloudflare.com * allow
* code.jquery.com * allow
* lib.sinaapp.com * allow
* libs.baidu.com * allow
* upcdn.b0.upaiyun * allow
* yandex.st * allow
* yastatic.net * allow
More rules could and should be added as long as you keep using the extensions.
Privacy Redirect
This one is a redirector for the most famous and used sites such as Twitter, Reddit or Youtube. Simply click on the icon and turn on/off which service you want to redirect to its respective frontend. Frontends are very useful at times when you can’t view content that is age restricted or simply because you are not logged in, not to mention that you also skip the annoying pop up windows from shitsites like Twitter. This shouldn’t be a problem since you are running uMatrix now, but it is good to know. Also, using a frontend like Invidious for Youtube, allows for navigation with no ads, no tracking (doesn’t log your IP) and without JS enabled.
Here is a quote from Nitter’s about section (logic applies to the other frontends):
It’s impossible to use Twitter without JavaScript enabled. For privacy-minded folks, preventing JavaScript analytics and IP-based tracking is important, but apart from using a VPN and uBlock/uMatrix, it’s impossible. Despite being behind a VPN and using heavy-duty adblockers, you can get accurately tracked with your browser’s fingerprint, no JavaScript required. This all became particularly important after Twitter removed the ability for users to control whether their data gets sent to advertisers. Using an instance of Nitter (hosted on a VPS for example), you can browse Twitter without JavaScript while retaining your privacy. In addition to respecting your privacy, Nitter is on average around 15 times lighter than Twitter, and in most cases serves pages faster (eg. timelines load 2-4x faster). In the future a simple account system will be added that lets you follow Twitter users, allowing you to have a clean chronological timeline without needing a Twitter account.
This is the list of sites that the extension allows to redirect:
- Twitter → Nitter
- Youtube → Invidious
- Instagram → Bibliogram
- Reddit → Libreddit or old version
- Google Translate → Simply Translate
- Wikipedia → Wikiless
- Google Maps → OpenStreetMaps
- Search Engine → custom
I recommend you go to the general options, where you can set the instance of the frontend you want to use.
We are done. Remember to run the test again and compare to see the results.
Not privacy/security related addons
- Stylus: custom/community generated css with one click
- ff2mpv: forward links to mpv (useful for when you break js/xhr/frame on sites that have videos)
- Vimium-FF: vimlike bindings